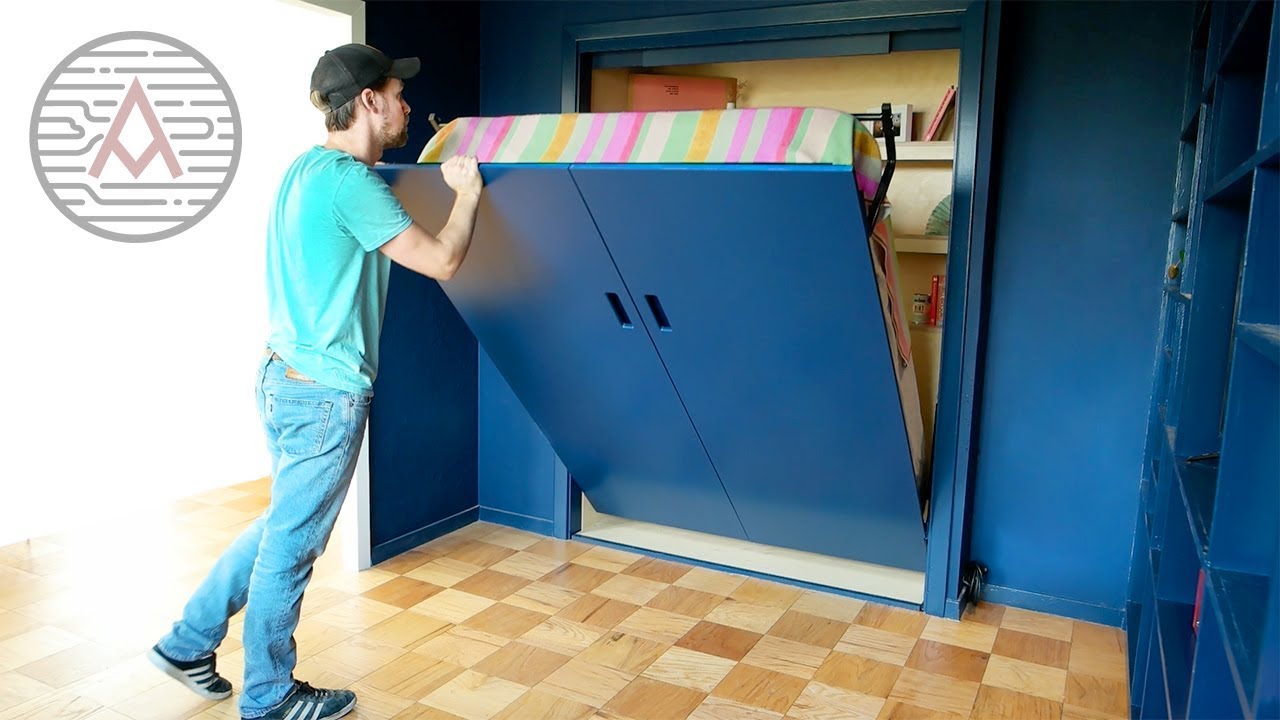
Are you looking to add a multi-functional piece to a small space? Look no further than converting a closet into a Murphy bed with DIY woodworking! In this video by Michael Alm, you’ll see how he transforms a closet into a guest bedroom with a twin-sized bed and built-in shelves made of baltic birch plywood. With tips and tricks for assembling the Murphy bed kit and working on a small job site, this project is perfect for anyone in need of a space-saving solution. If you’re curious about the process or the tools used, don’t hesitate to ask in the comments. Get ready to be inspired!
In the workshop, Michael expresses his excitement for the Murphy bed project by Rockler, sharing insights into the challenges of moving materials to a fifth-floor condo and making adjustments for a full-size bed fit. With attention to detail in using high-quality materials like baltic birch plywood and deck screws, he ensures a sturdy and durable end result. As he works through the project, including building shelves and assembling the bed frame, he invites viewers to follow along for an interesting and informative woodworking journey. So, if you’re looking to create a versatile space in your home, this DIY Murphy bed project is one to watch!

Materials and Tools Needed
To start building a Murphy Bed in a closet, you will need the following materials and tools:
Baltic birch plywood
Baltic birch plywood is a sturdy and high-quality material that will form the walls and shelves of the Murphy Bed structure.
Murphy Bed kit
A Murphy Bed kit includes all the hardware and mechanisms necessary to create a functional wall bed that can be easily folded away when not in use.
Deck screws
Deck screws are ideal for securing the plywood pieces together, ensuring a strong and durable structure.
Nail gun
A nail gun will make the assembly process faster and more efficient, allowing you to attach the pieces with precision and strength.
Spacer blocks
Spacer blocks will help ensure even spacing and alignment of the components, resulting in a professional finish.
Angle finder and gauge
An angle finder and gauge will assist in making precise angle cuts for a tight fit, especially in corners and joints.
Finish for wood
A finish for wood will protect the plywood from wear and tear, as well as enhance the aesthetic appeal of the Murphy Bed structure.
Sander
A sander will be essential for smoothing out any rough edges or surfaces on the plywood, creating a polished and professional look.
Paint for finishing
Paint can be used to finish the wood, giving it a cohesive and appealing appearance that matches the surrounding décor.
Baffles for handles
Baffles will be used to cover the handles of the Murphy Bed, ensuring a clean and seamless look when the bed is closed.
Preparing the Closet Space
Measuring the closet space
Before starting the project, measure the dimensions of the closet space to ensure that the Murphy Bed will fit properly.
Making adjustments for the bed size
If the closet is not an exact match for the Murphy Bed size, make necessary adjustments to accommodate the bed dimensions.
Addressing challenges of transporting materials to the fifth floor condo
Plan ahead for the logistical challenge of transporting materials to a fifth-floor condo, considering weight and size limitations.
Creating support blocks for stability
To ensure stability and support for the Murphy Bed structure, create blocks that can be installed securely within the closet space.
Building the Frame and Shelves
Cutting and assembling the wood for the walls and shelves
Cut the Baltic birch plywood to the required dimensions and assemble the pieces to form the walls and shelves of the Murphy Bed structure.
Creating angle cuts for a tight fit
Use an angle finder and gauge to make precise angle cuts where necessary, ensuring a snug and secure fit between the plywood pieces.
Tracing out plywood sheets for accurate dimensions
To maintain accuracy and alignment, trace out the plywood sheets for the shelves based on the closet dimensions before cutting them to size.
Sanding and finishing the wood for a polished look
After assembling the structure, sand down any rough edges or surfaces on the plywood and apply a finish or paint for a professional and appealing appearance.
Assembling the Murphy Bed Mechanism
Installing the hardware and mechanism for the bed
Follow the instructions provided with the Murphy Bed kit to install the necessary hardware and mechanisms for the bed frame.
Attaching the mattress holder and legs for support
Securely attach the mattress holder and legs to the Murphy Bed frame to provide support and stability when the bed is in use.
Adding a block for safety and function
Install a block within the Murphy Bed frame to prevent the bed from going too far back when in use, ensuring safety and proper functionality.
Testing the bed frame for smooth operation
Before completing the assembly, test the Murphy Bed frame to ensure that it operates smoothly and efficiently, with no obstructions or issues.

Final Touches and Accessories
Adding baffles for aesthetics
Install baffles over the handles of the Murphy Bed to enhance the aesthetic appeal and provide a seamless finish.
Painting and finishing the wood for a cohesive look
Apply a coat of paint or finish to the wood surfaces of the Murphy Bed structure to create a cohesive and visually pleasing appearance.
Testing the functionality of the Murphy Bed
Verify that the Murphy Bed functions correctly, folding in and out smoothly without any hindrances or difficulties.
Ensuring all components are secure and stable
Check that all components of the Murphy Bed are securely fastened and stable, providing a safe and reliable sleeping space.
Review and Recommendations
Sharing feedback on the Rockler Murphy Bed kit
Provide feedback on the performance, quality, and ease of use of the Rockler Murphy Bed kit used in the project.
Recommendations for those considering a similar project
Offer helpful tips and suggestions for individuals who are planning to convert a closet into a Murphy Bed, based on your experience with the project.
Highlighting the benefits and challenges of converting a closet into a Murphy Bed
Discuss the advantages and potential obstacles of transforming a closet into a multifunctional space with a Murphy Bed, outlining both the positives and negatives.

Conclusion
In conclusion, converting a closet into a Murphy Bed is a rewarding and practical project that can maximize space and functionality in a living area. By using high-quality materials and the right tools, such as Baltic birch plywood, a Murphy Bed kit, and essential hardware, you can create a comfortable and convenient sleeping space that can be easily stored away when not in use. From preparing the closet space and building the frame and shelves to assembling the Murphy Bed mechanism and adding final touches, this project requires attention to detail and precision. By following the outlined steps and recommendations, you can successfully transform a closet into a Murphy Bed that meets your needs and enhances your living space. Thank you for watching and remember to reach out with any questions or feedback on your own Murphy Bed projects. Happy building!
